Gruppen erstellen und einsetzen
Create and use groups
Ziele:
In dieser Anleitung erfahren Sie, wie Sie manuell Gruppen in Moodle anlegen und mit Studierenden befüllen können. Weiters wird gezeigt, wie Sie Inhalte selektiv für eine Gruppe freigeben, Gruppenbereiche in Aktivitäten erstellen und den ganzen Kurs in den Gruppenmodus umstellen können. Erfahren Sie auch, wie Sie anschließend in den Aktivitäten nach Gruppen filtern können.
Schwierigkeit: einfach
Gültig ab Moodle Version 4.3
Goals:
In this guide you will learn how to manually create groups in Moodle and fill them with students. It also shows how to selectively share content with a group, create group areas in activities, and switch the entire course to group mode. Also learn how to subsequently filter for groups in activities.
Difficulty: easy
Valid from Moodle version 4.3
14 Schritte:
Hinweis: Für erweiterte Gruppenfunktionen (studentische Selbstanmeldung, Anmeldedeadlines, Warteschlangen) ist die „Gruppenverwaltung“ die geeignete Aktivität.
Note: For advanced group features (student self-registration, registration deadlines, queues), the "Grouptool" is the appropriate activity.
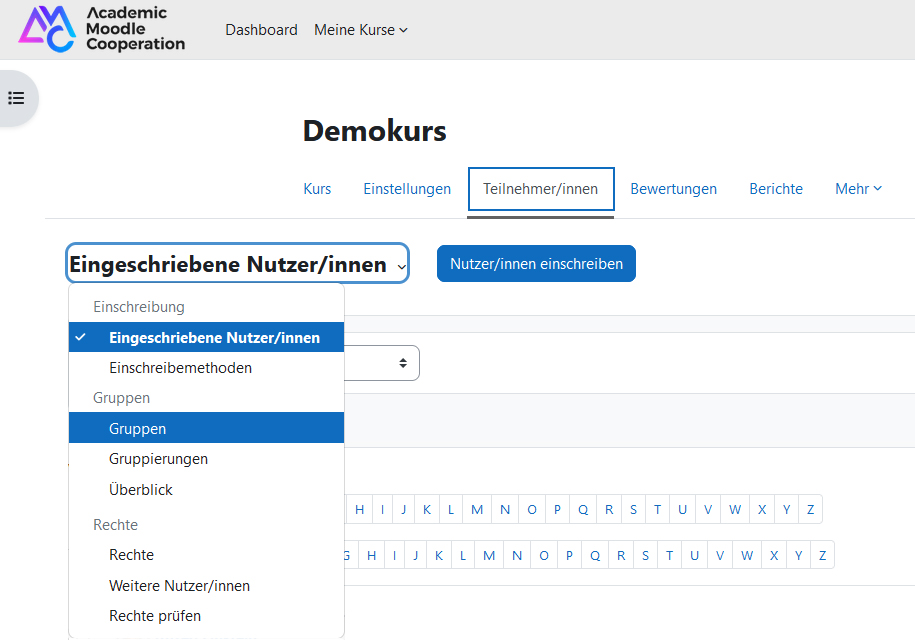
1. Moodle-Gruppen aufrufen
Um zu den Moodle-Gruppen zu gelangen, klicken Sie zunächst oben im Kurs auf das Register „Teilnehmer/innen“. Wählen Sie dann links oben aus dem Drop-down-Menü die Option „Gruppen“ aus.
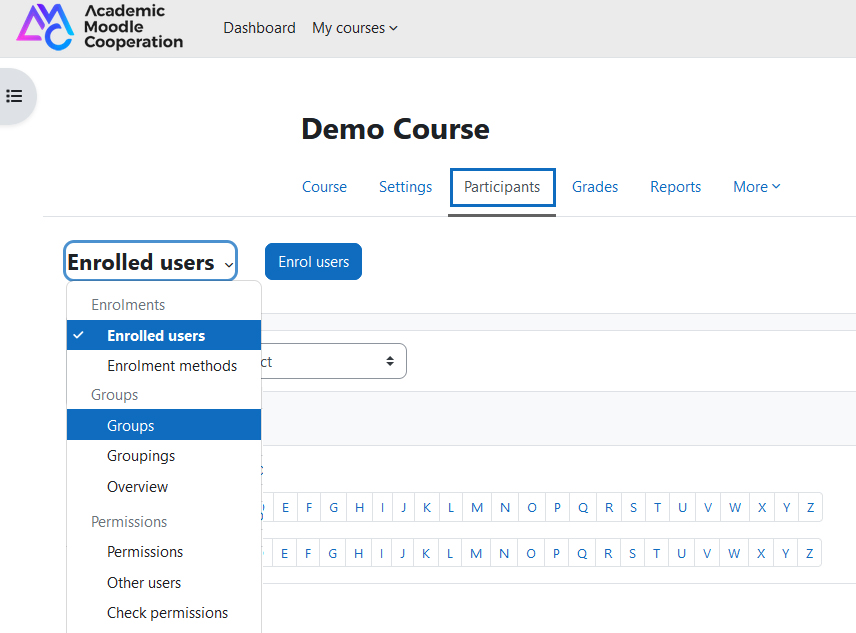
1. Accessing Moodle groups
To access Moodle groups, first click on the "Participants" tab at the top of the course. Then select "Groups" from the drop-down menu at the top left.
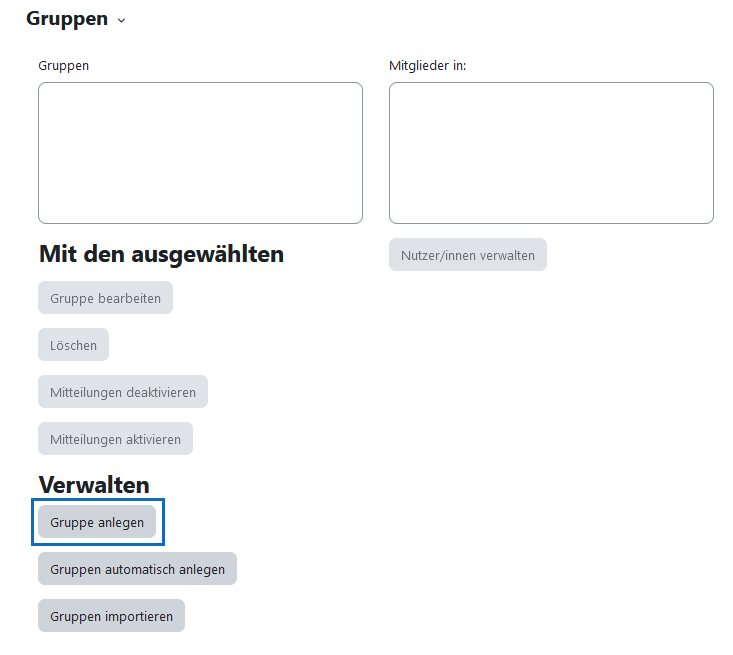
2. Gruppen manuell anlegen
Klicken Sie im folgenden Fenster links unten auf „Gruppe anlegen“.
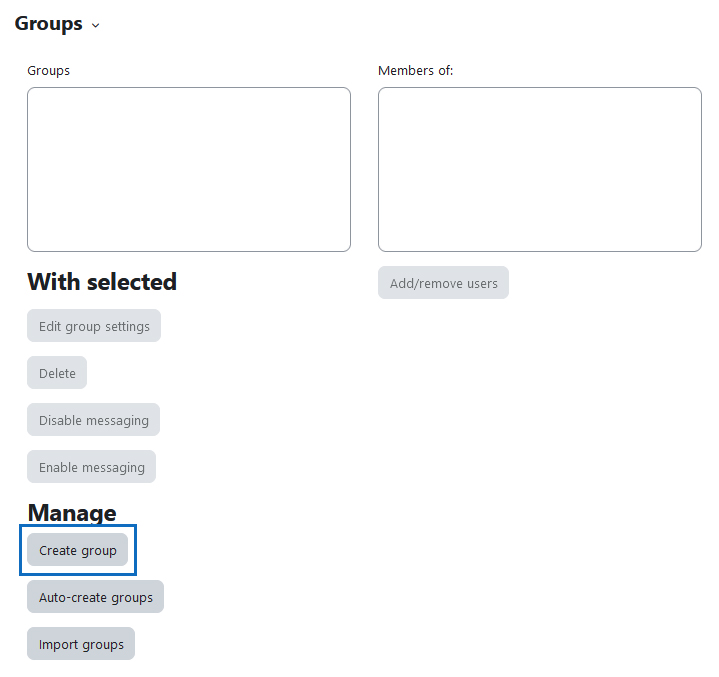
2. Creating groups manually
In the following window, click on "Create group" in the lower left corner.
3. Namen eingeben & Einstellungen vornehmen
Geben Sie der Gruppe einen Namen und tragen Sie im Formular optional weitere Informationen zur Gruppe ein bzw. nehmen Sie weitere Einstellungen vor. Um die Gruppe anzulegen, klicken Sie auf „Änderungen speichern“.
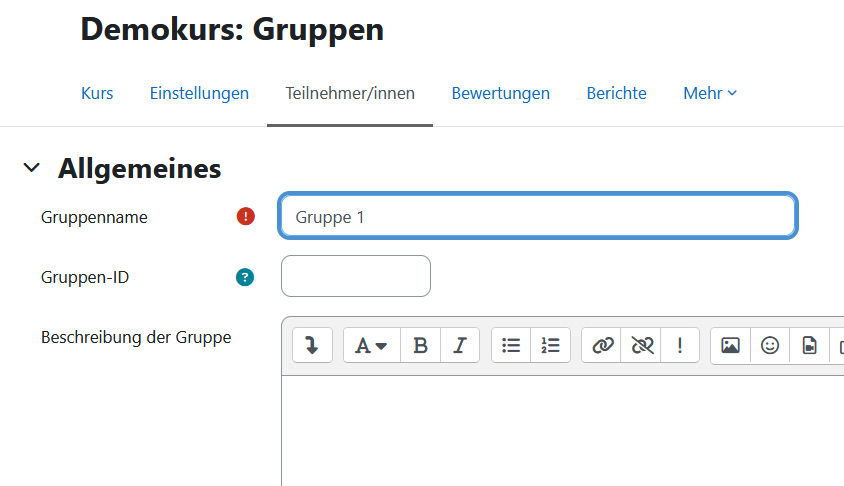
3. Enter name & make settings
Give the group a name and optionally enter further information about the group or make further settings in the form. To create the group, click "Save changes".

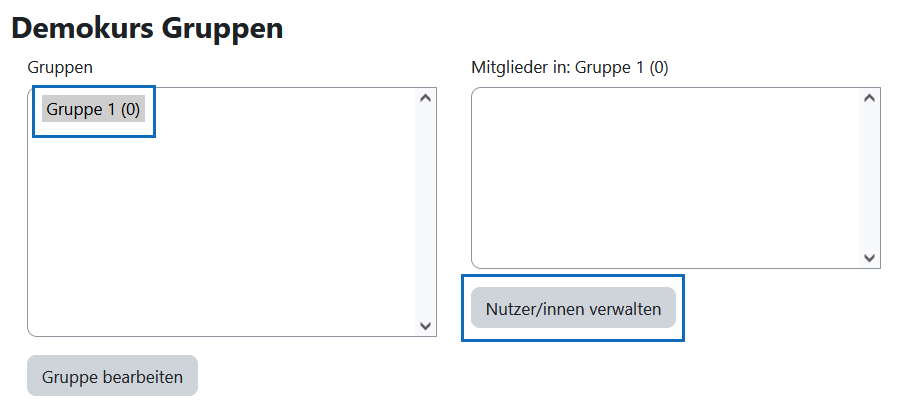
4. Gruppe auswählen
Wählen Sie nun in der linken Spalte die soeben erstellte Gruppe aus und klicken Sie rechts unten auf die Schaltfläche „Nutzer/innen verwalten“.
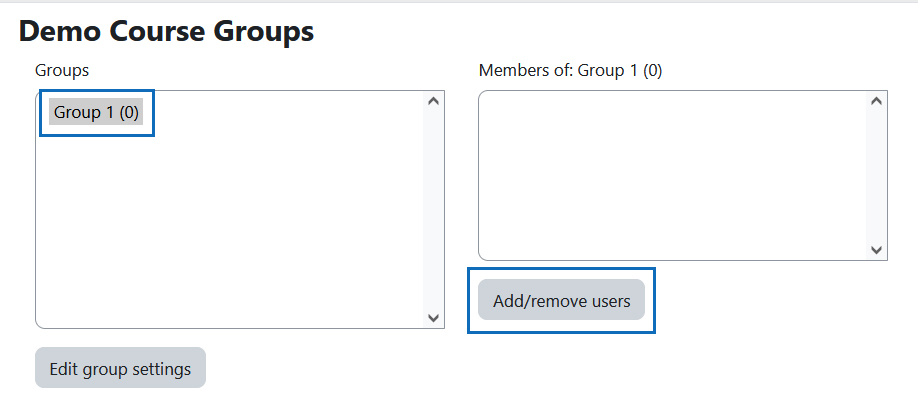
4. Select group
Now select the group you just created in the left column and click the "Add/remove users" button in the bottom right corner.
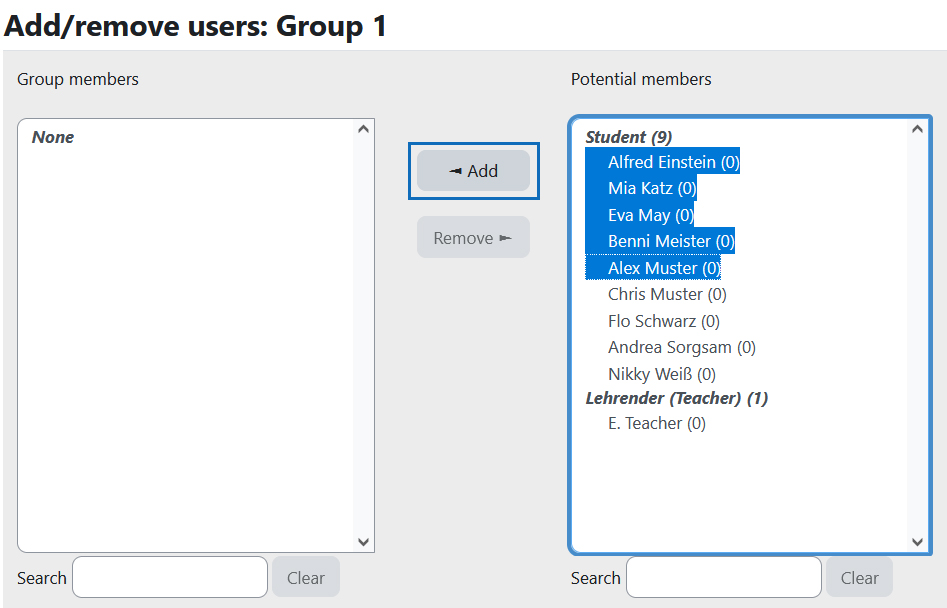
5. Nutzer/innen hinzufügen
Um einer Gruppe eine oder mehrere Personen hinzuzufügen, müssen Sie diese in der Liste „Mögliche Mitglieder“ auswählen und anschließend auf die Schaltfläche „Hinzufügen“ klicken. Bei Bedarf hilft das Suchfeld unten beim Auffinden der gewünschten Person.
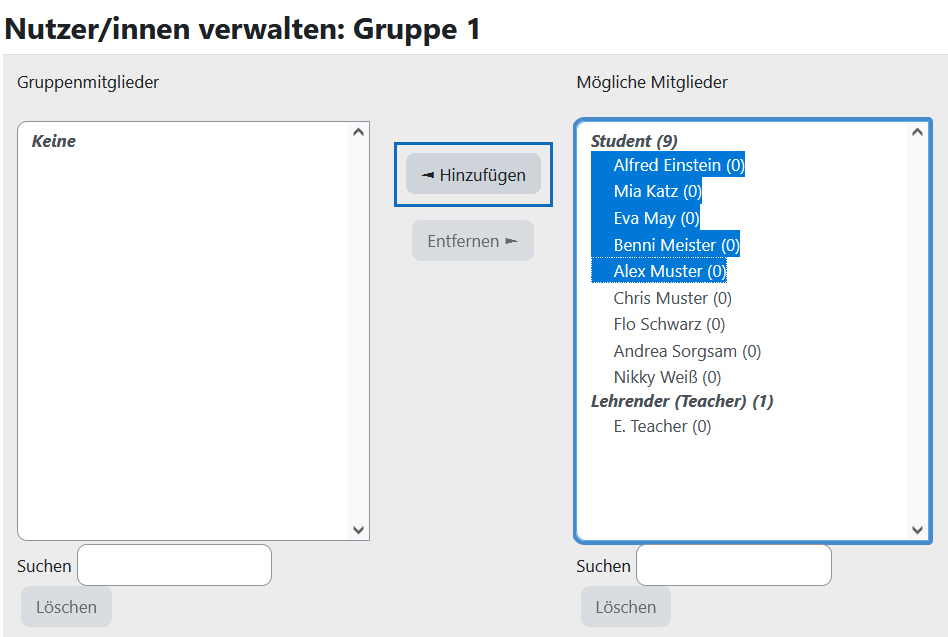
5. Add users
To add one or more persons to a group, you need to select them in the "Potential members" list and then click the "Add" button. If necessary, the search field at the bottom will help you find the desired person.
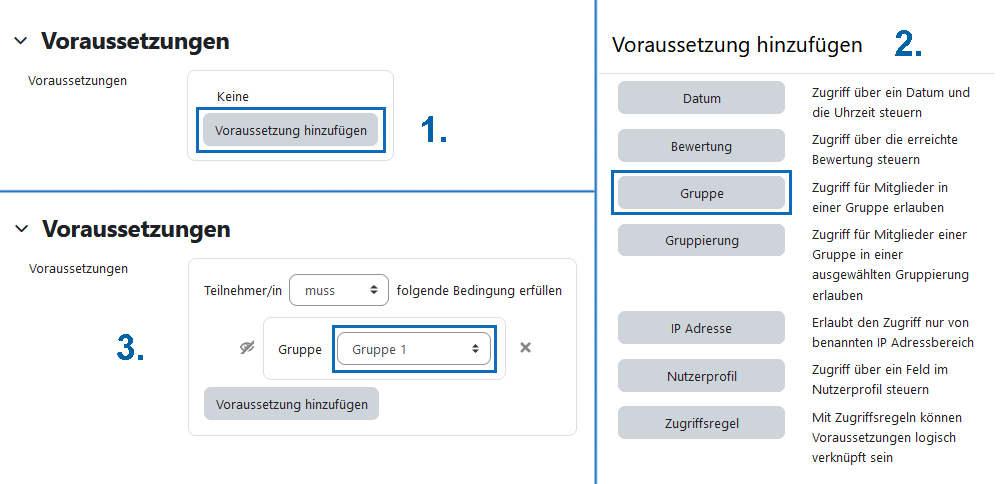
Anwendung: Inhalte nur für nur eine Gruppe freigeben
Klicken Sie zunächst in den Einstellungen einer Aktivität oder eines Materials im Bereich „Voraussetzungen“ auf die Schaltfläche „Voraussetzung hinzufügen“. Klicken Sie dann im folgenden Fenster auf „Gruppe“. Wählen Sie nun aus dem Drop-down-Menü die gewünschte Gruppe aus. Vergessen Sie nicht, die Einstellungen abschließend zu speichern!
Hinweis: Mehr zu Voraussetzungen finden Sie in der Anleitung „Voraussetzungen definieren“.
Tipp: Möchten Sie etwas für mehrere Gruppen freigegeben, fassen Sie diese am besten zu einer Gruppierung zusammen und fügen dann die Gruppierung als Voraussetzung in den Einstellungen der Aktivität oder des Materials hinzu (siehe Anleitung „Gruppierungen erstellen und nutzen“).
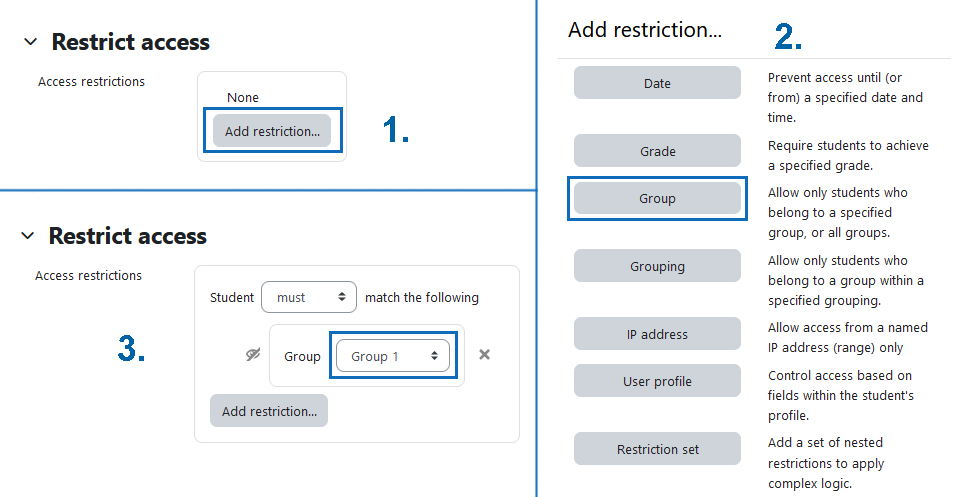
Application: Share content with only one group
In the settings of an activity or a resource, first click the "Add restriction" button in the "Restrict access" area. Then click "Group" in the following window. Now select the desired group from the drop-down menu. Don't forget to save the settings finally!
Note: For more information on restrictions, see the guide "Defining restrict access".
Tip: If you want to share something with multiple groups, it's best to combine them into a grouping and then add the grouping as a access restriction in the activity or resource settings (see "Create and use groupings").
Anwendung: Gruppenbereiche in Aktivitäten einrichten
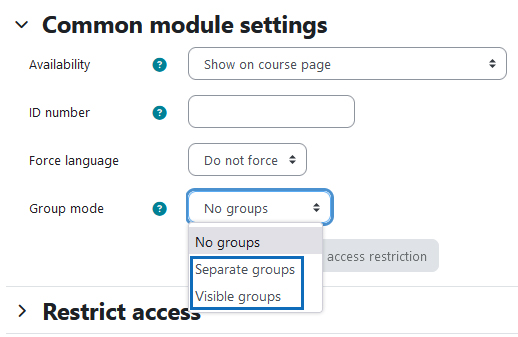
Bestimmte Moodle-Aktivitäten wie Foren und Wikis erlauben auch eigene Gruppenbereiche, in denen nur die jeweiligen Gruppenmitglieder schreiben können. Um Gruppenbereiche einzurichten, wählen Sie in den Einstellungen der Aktivität im Bereich „Weitere Einstellungen“ unter „Gruppenmodus“ entweder „Getrennte Gruppen“, wenn jede Gruppe einen für andere unsichtbaren Bereich erhalten soll, oder
„Sichtbare Gruppen“, wenn Teilnehmer/innen anderer Gruppen mitlesen dürfen.
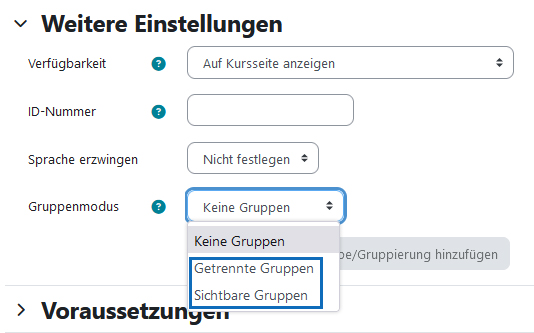
Application: Group areas in activities
Certain Moodle activities such as forums and wikis also allow separate group areas where only the respective group members can write. To set up group areas, select in the "Common module settings" section of the activity's settings under "Group mode" either "Separate groups" if you want each group to have an area that is invisible to others, or "Visible groups" if participants in other groups are allowed to read along.
Anwendung: nach Gruppen filtern
Lehrende - und im Falle sichtbarer Gruppen auch Studierende - können sich dann die einzelnen Gruppenbereiche anzeigen lassen, indem Sie die entsprechende Gruppe im Drop-down-Menü links oben in der Aktivität auswählen.
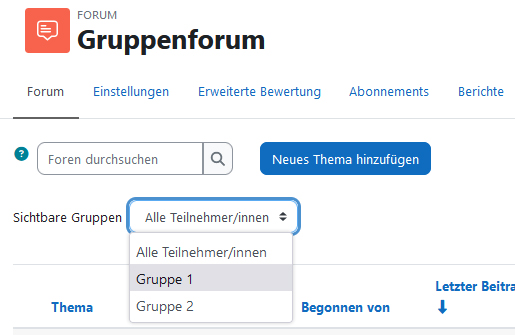
Application: filter by group
Teachers - and students in the case of visible groups - can then view the individual group areas by selecting the appropriate group from the drop-down menu at the top left of the activity.

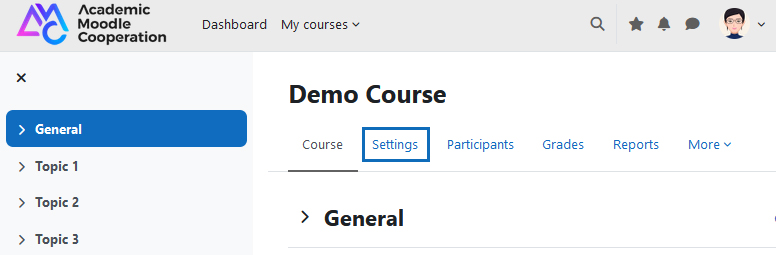
Anwendung: Gruppenmodus für den Kurs
Weiters können Sie den Gruppenmodus auch für den gesamten Kurs aktivieren. Klicken Sie dazu zunächst oben im Kurs auf das Register „Einstellungen“.
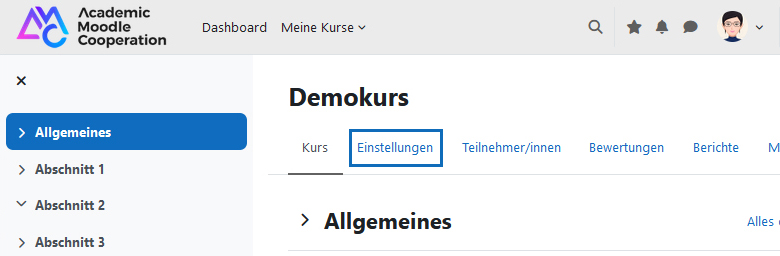
Application: Group mode for the course
Furthermore, you can also activate the group mode for the entire course. To do this, first click on the "Settings" tab at the top of the course.
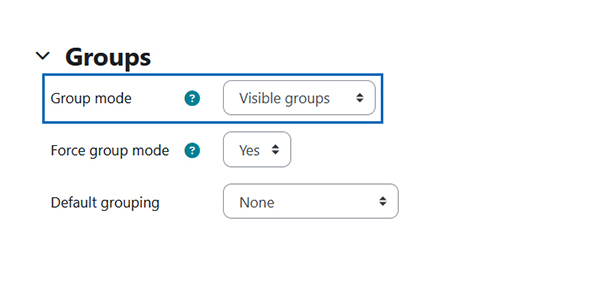
Im Abschnitt „Gruppen“ wählen Sie nun bei „Gruppenmodus“ entweder „Sichtbare Gruppen“ oder „Getrennte Gruppen“ aus. Vergessen Sie nicht, die Einstellung zu speichern!
Damit werden nun alle neu erstellten Aktivitäten im gewählten Gruppenmodus angelegt und Sie können links oben in der Aktivität und auch in der Bewertungsübersicht nach Gruppen filtern. Es ist möglich, den Gruppenmodus in den Einstellungen einzelner Aktivitäten auch individuell zu ändern.
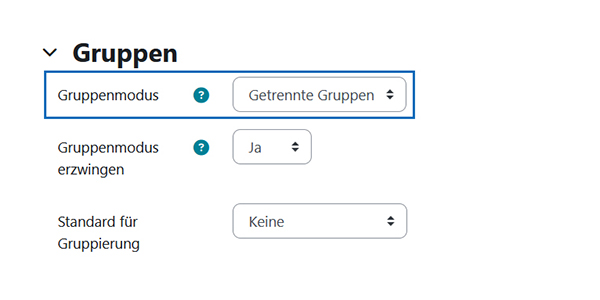
In the "Groups" section, select either "Visible groups" or "Separate groups" for "Group mode". Do not forget to save the setting!
Now all newly created activities will be created in the selected group mode and you can filter for groups in the upper left corner of the activity and also in the "Grader report". It is also possible to change the group mode individually in the settings of specific activities.
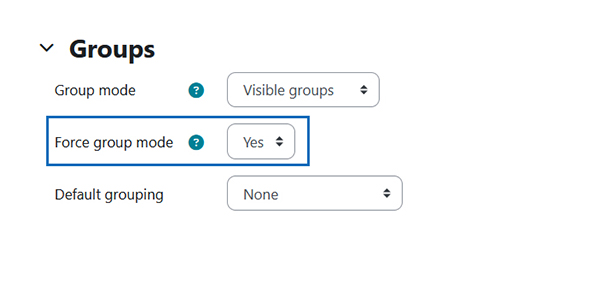
Hinweis: Wenn Sie bei „Gruppenmodus erzwingen“ die Option „Ja“ auswählen, werden alle Aktivitäten – auch die bereits vorhandenen – in den ausgewählten Gruppenmodus versetzt. Der Gruppenmodus kann in diesem Fall nicht in den Einzelaktivitäten geändert werden.
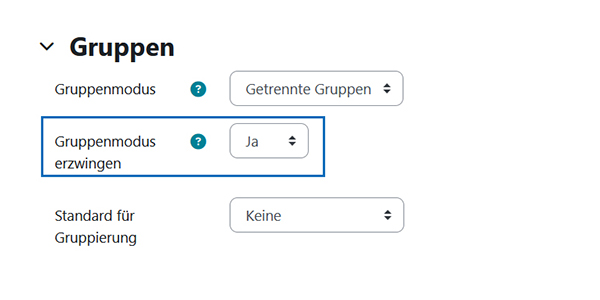
Note: If you select "Yes" for "Force group mode", all activities - including the already existing ones - will be set to the selected group mode. In this case, the group mode cannot be changed in the individual activities.
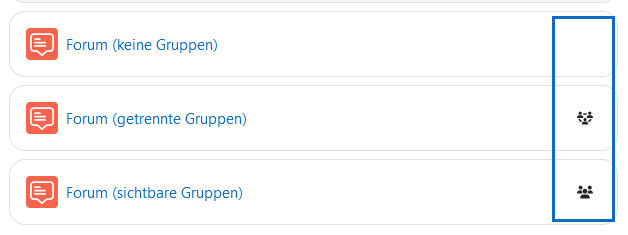
Hinweis: Ob sich eine Aktivität im Gruppenmodus befindet und wenn ja, in welchem, können Sie auf der Kursseite am entsprechenden Gruppensymbol ganz rechts in der Zeile des jeweiligen Elements erkennen. Bei eingeschaltetem Bearbeitungsmodus können Sie den Gruppenmodus eines Elements durch Klick auf das Symbol und anschließende Auswahl eines anderen Modus ändern, ohne in die Einstellungen des Elements wechseln zu müssen.
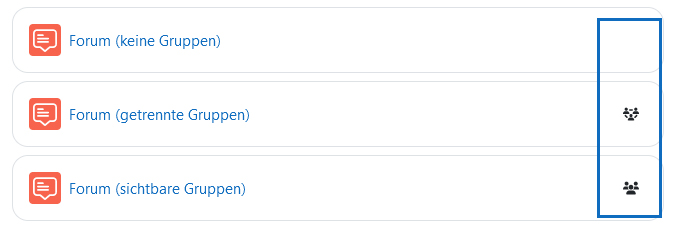
Note: On the course page you can see whether an activity is in group mode and if so, in which mode, by the corresponding group symbol on the far right in the line of the respective element. When editing mode is switched on, you can change the group mode of an element by clicking on the icon and then selecting a different mode without having to switch to the element settings.
Weitere Informationen
Bei Fragen zur Barrierefreiheit wenden Sie sich bitte an die entsprechende Supporteinrichtung Ihrer Hochschule.
Dieses Werk steht unter einer Creative Commons Attribution-ShareAlike 4.0 Lizenz:
https://creativecommons.org/licenses/by-sa/4.0/
Further information
If you have any questions regarding accessibility, please contact the relevant support facility at your university.
This work is licensed under a Creative Commons Attribution-ShareAlike 4.0 License:
https://creativecommons.org/licenses/by-sa/4.0/